Ever have the problem as a kid where the toilet won’t stop running? You’re in your bed, looking up at the ceiling and can’t sleep because all you hear is running water. Or maybe you were doing homework and couldn’t concentrate because the toilet is magically running. “Just jiggle the handle” would solve the problem temporarily, but in another 5 20 minutes, you’ll hear the not-so-soothing sound of running water again. Maybe now you’re an adult, and you don’t have the time or energy to find actually diagnose what’s wrong and permanently solve the problem. Don’t worry, we got you. Walk through this list, and you’ll almost certainly land on the right one.
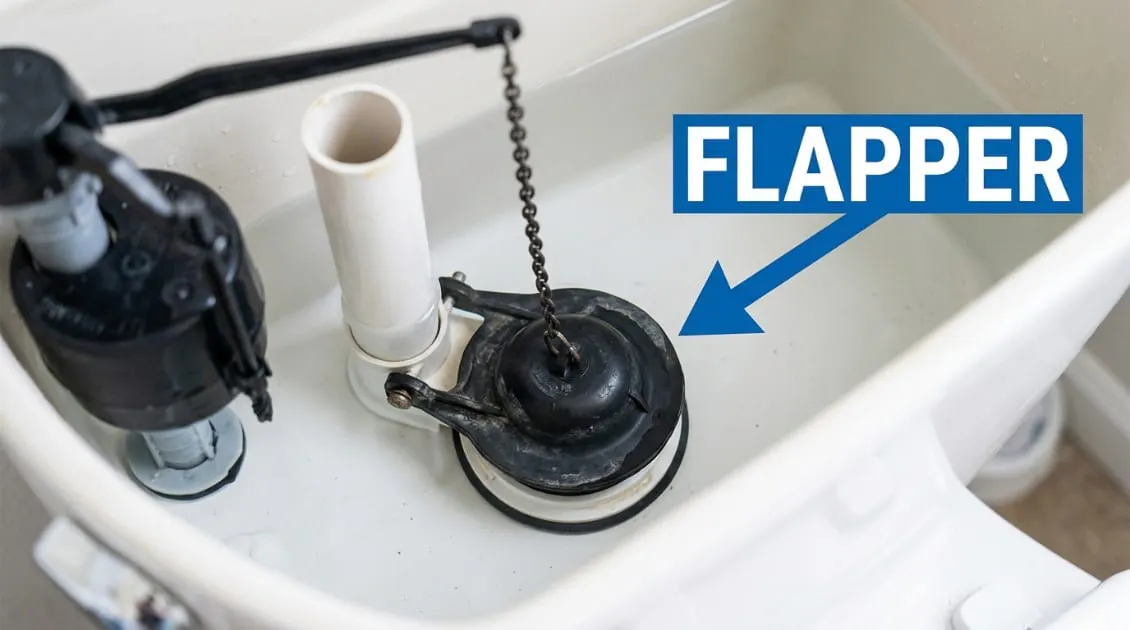
This is, by far, the most common cause. The flapper is the rubber or silicone seal at the bottom of the tank. Over time, especially with in-tank cleaning tablets, which are notoriously hard on rubber, it warps, cracks, or stops sealing flat. Water leaks past it into the bowl, and the fill valve keeps kicking on to compensate.
How to tell: Water level in the tank looks lower than usual, and you may hear a faint hiss without seeing water actively pour into the overflow tube. The leak is often intermittent rather than constant. You might notice the toilet “phantom flushing” itself for a few seconds every 20-60 minutes as the fill valve tops off what leaked out.
Fix: A new flapper costs $5-15 and takes about 15 minutes to swap, no tools required. Full instructions are in our step-by-step flapper replacement guide.
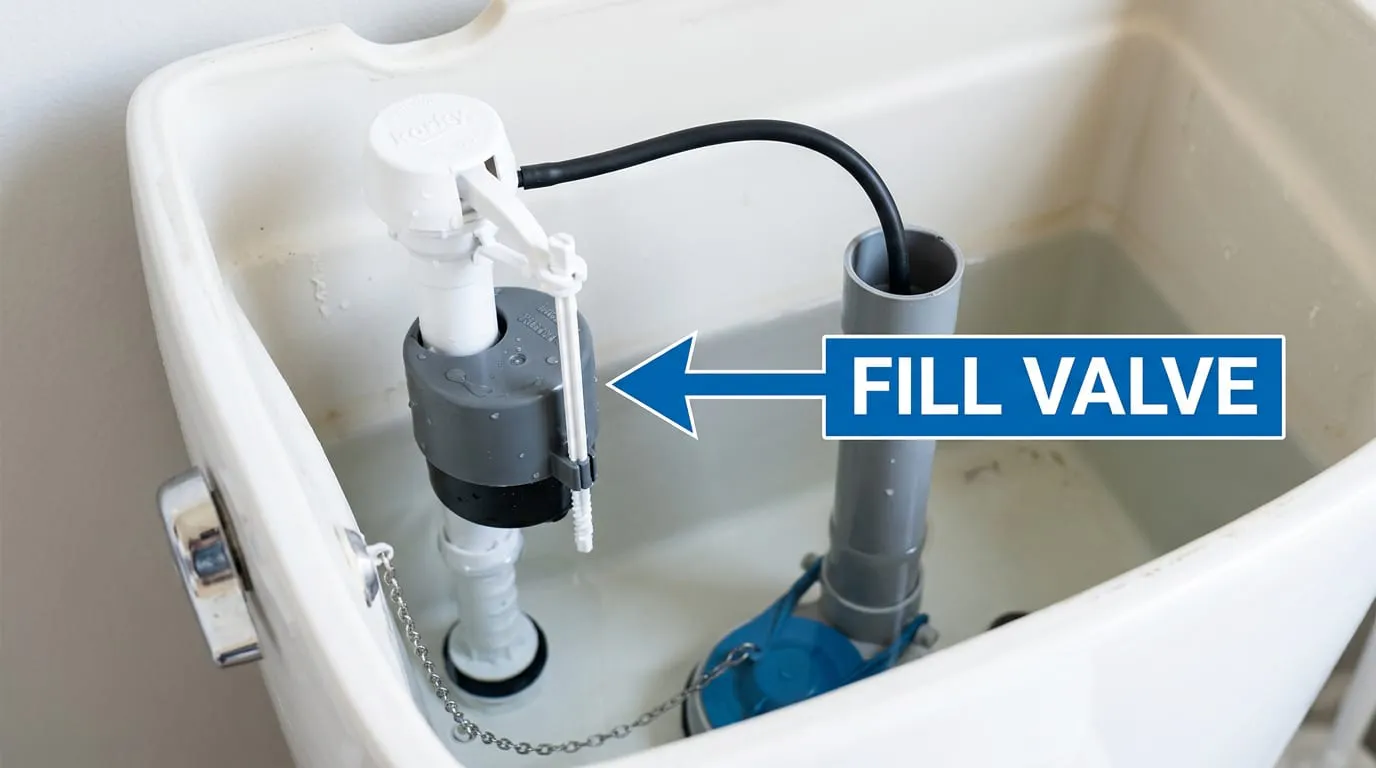
The fill valve refills the tank after a flush and is supposed to shut off completely once the water reaches the right level. When its internal seal or float mechanism wears out, it can’t shut off all the way, so water keeps trickling into the overflow tube around the clock.
How to tell: Water is visibly running into the overflow tube, the tall tube in the center of the tank, even when nothing else looks unusual. You might also hear a whine, chatter, or vibrating noise, especially right after a flush, which usually means a worn washer inside the valve.
Fix: Replacement fill valves run $10-25. See our fill valve replacement guide for the full walkthrough.
Less common, but it happens: the flush valve seat (the part the flapper actually seals against) can corrode or crack, or the overflow tube itself can develop a crack near the base. Even a brand-new flapper won’t seal properly against a damaged seat.
How to tell: You’ve already replaced the flapper, the seal still isn’t holding, and you can see visible corrosion, rough texture, or cracking around the flush valve opening when you look closely. Running your finger gently around the seat (with the water off and tank drained) can reveal roughness or pitting that’s hard to spot by eye alone.
Fix: This usually means replacing the entire flush valve assembly, which involves removing the tank from the bowl, a bigger job than a flapper or fill valve swap. Parts run $15-30, but pulling and resetting the tank (including a new tank-to-bowl gasket, always worth replacing while it’s apart) makes this a longer project, often 1-2 hours the first time. If you’re not comfortable pulling the tank, hand it to a plumber, typically a $100-200 service call.
The float, either a ball on an arm or a cup around the fill valve shaft, tells the fill valve when to shut off. If it’s set too high, the tank overfills past the top of the overflow tube, and excess water just drains continuously down the tube and out, mimicking a running toilet.
How to tell: Water sits right at or above the top of the overflow tube instead of an inch below it.
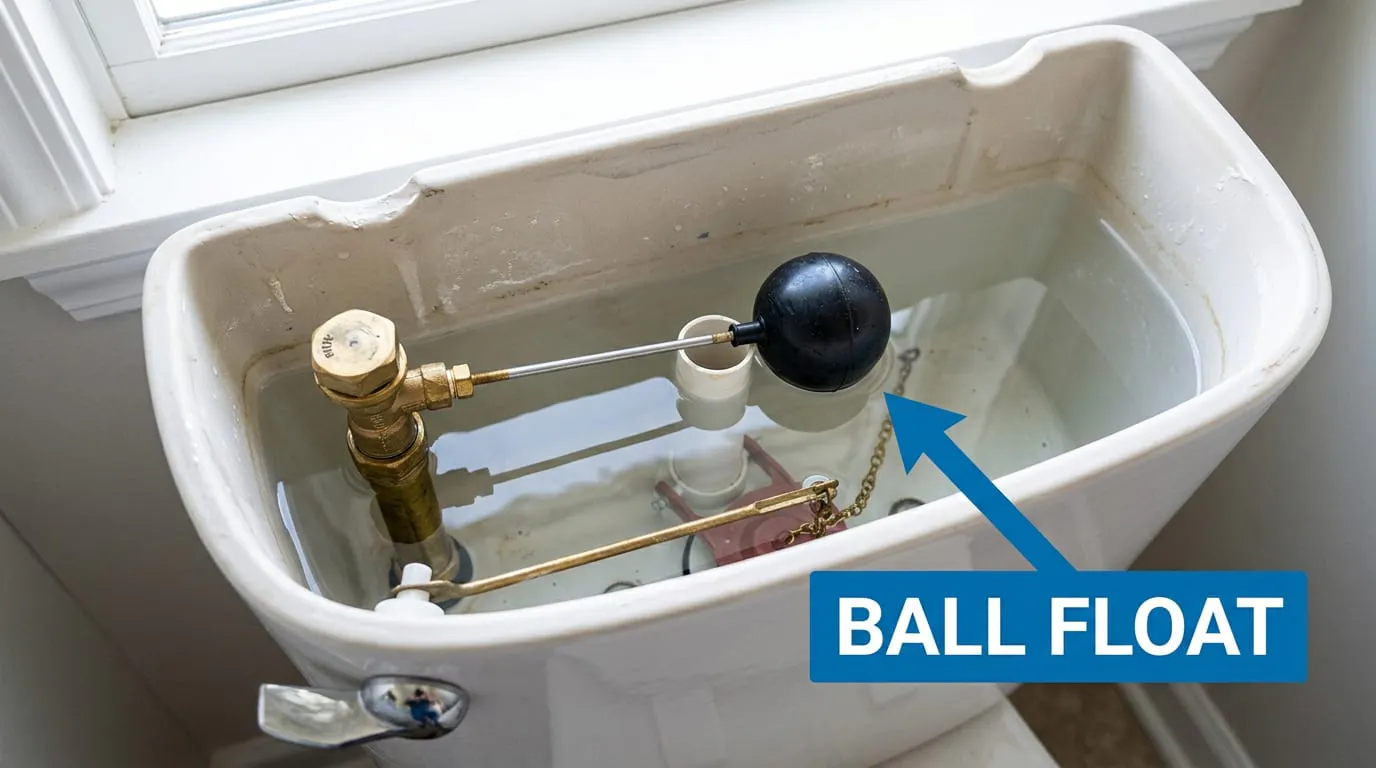
Fix: Adjust the float down. On ball-and-arm styles, gently bend the arm downward; on cup-style floats, there’s usually a clip or screw to lower it. This takes about 2 minutes and costs nothing. If adjusting doesn’t help, the fill valve itself may need replacing, see our fill valve guide.
The chain connects the flush handle to the flapper. If it’s too long, it can get pinched under the flapper and prevent a full seal. If it’s too short, the flapper gets held open slightly after every flush, letting water run continuously.
How to tell: Look inside the tank while the toilet is idle. If the chain looks bunched up, caught, or pulled taut with no slack, that’s your answer. A chain with visible slack of about a half-inch when the flapper is fully seated is the target; anything pulled bowstring-tight or hanging in loose loops under the flapper is a red flag.
Fix: Unhook the chain and re-clip it with about a half-inch of slack when the flapper is fully seated. Free, and takes under a minute. If the chain looks fine but the flapper still won’t seal, it’s likely time for a flapper replacement.
In-tank drop-in or clip-on cleaning tablets (especially bleach-based ones) are convenient, but they’re one of the top causes of premature flapper failure. The chemicals break down rubber and plastic components over months of exposure, leading to leaks well before a flapper’s normal lifespan.
How to tell: If you use in-tank tablets and your flapper looks unusually soft, swollen, or discolored, that’s the giveaway. It’s also worth checking the fill valve and other plastic tank components for the same kind of premature wear.
Fix: Replace the flapper (see our guide) and consider switching to in-bowl cleaners instead of in-tank ones going forward to avoid a repeat.
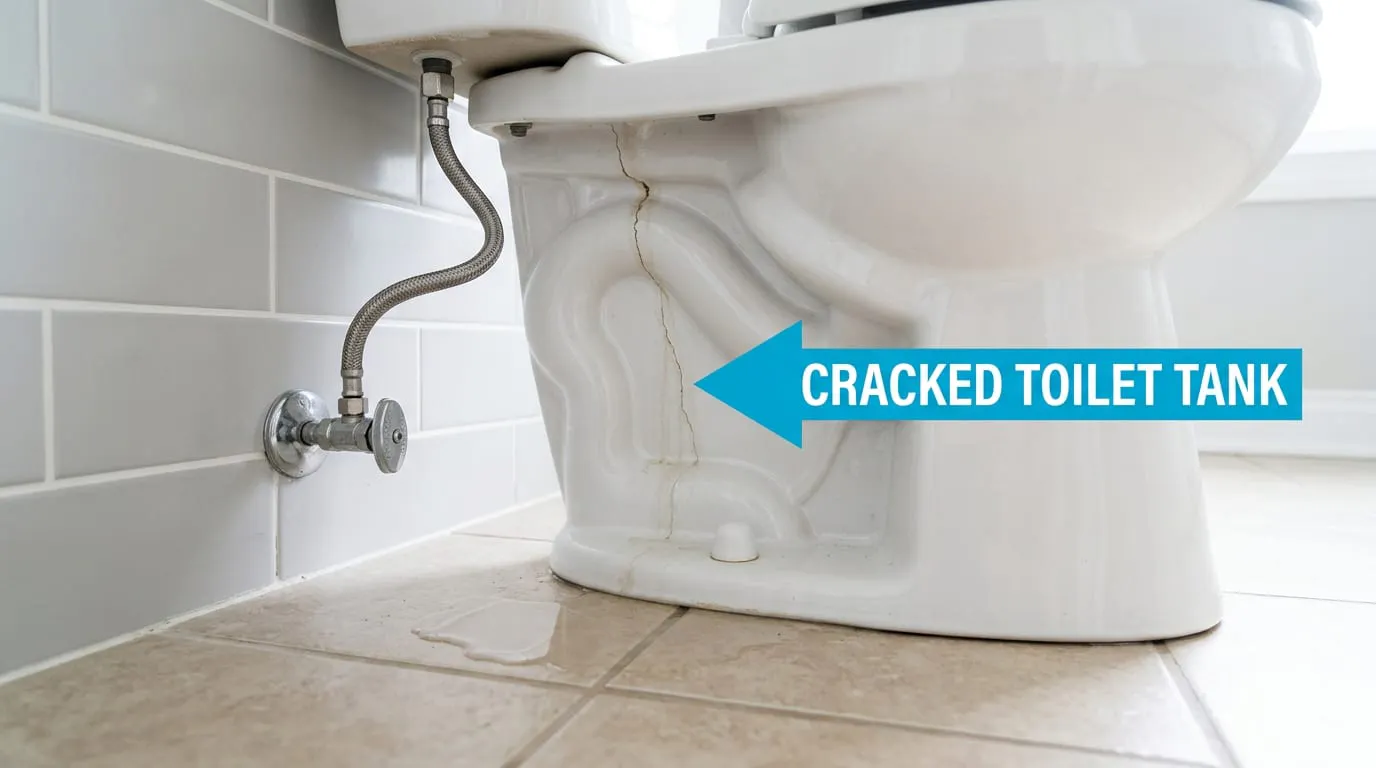
The rarest cause on this list, but worth ruling out if nothing else explains a persistent leak: a hairline crack in the tank itself, sometimes only visible as a damp spot or mineral trail down the outside of the porcelain.
How to tell: Water on the floor or down the back of the toilet even when all internal parts look and test fine. Sometimes the only clue is a small puddle that reappears no matter how many times you dry it up, or a faint mineral trail staining the porcelain where water has been slowly seeping and evaporating.
Fix: This is the one scenario on this list where DIY isn’t the move. A cracked tank needs professional evaluation and likely replacement. Don’t try to seal or patch it yourself; a failure while you’re away from home can cause serious water damage.
Most running-toilet problems are simple tank-part fixes, but it’s time to call a licensed plumber if the issue involves a risk of water damage, a failed repair, or work you’re not comfortable doing.
Call a pro if:
HomeFlash tip: Our running toilet diagnosis guide walks through that quick test in more detail if you want a simpler starting point than this full list. If the repair requires more than replacing a flapper, adjusting a float, or re-clipping a chain, and you are unsure of the next step, snap a photo of the open tank in the HomeFlash app first. We’ll help you identify the likely component and flag cases where a licensed plumber is the safer call.
For a quick reference, here’s roughly what each cause costs and how long it takes to fix:
Six of these seven causes are things almost anyone can fix themselves, usually for under $25 and less than half an hour. The seventh, a cracked tank, is rare, and it’s the one time you should stop and call a pro. For the full hub covering every angle of this problem, see our complete guide to fixing a running toilet.
Written by Will, Founder of HomeFlash.
More plain-English repair guides from the HomeFlash library.

Toilet Fill Valve Replacement: When and How
Learn when a running toilet means the fill valve, not the flapper, plus a full step-by-step replacement guide anyone can do in 30 minutes.
Sep 30, 2026
Learn more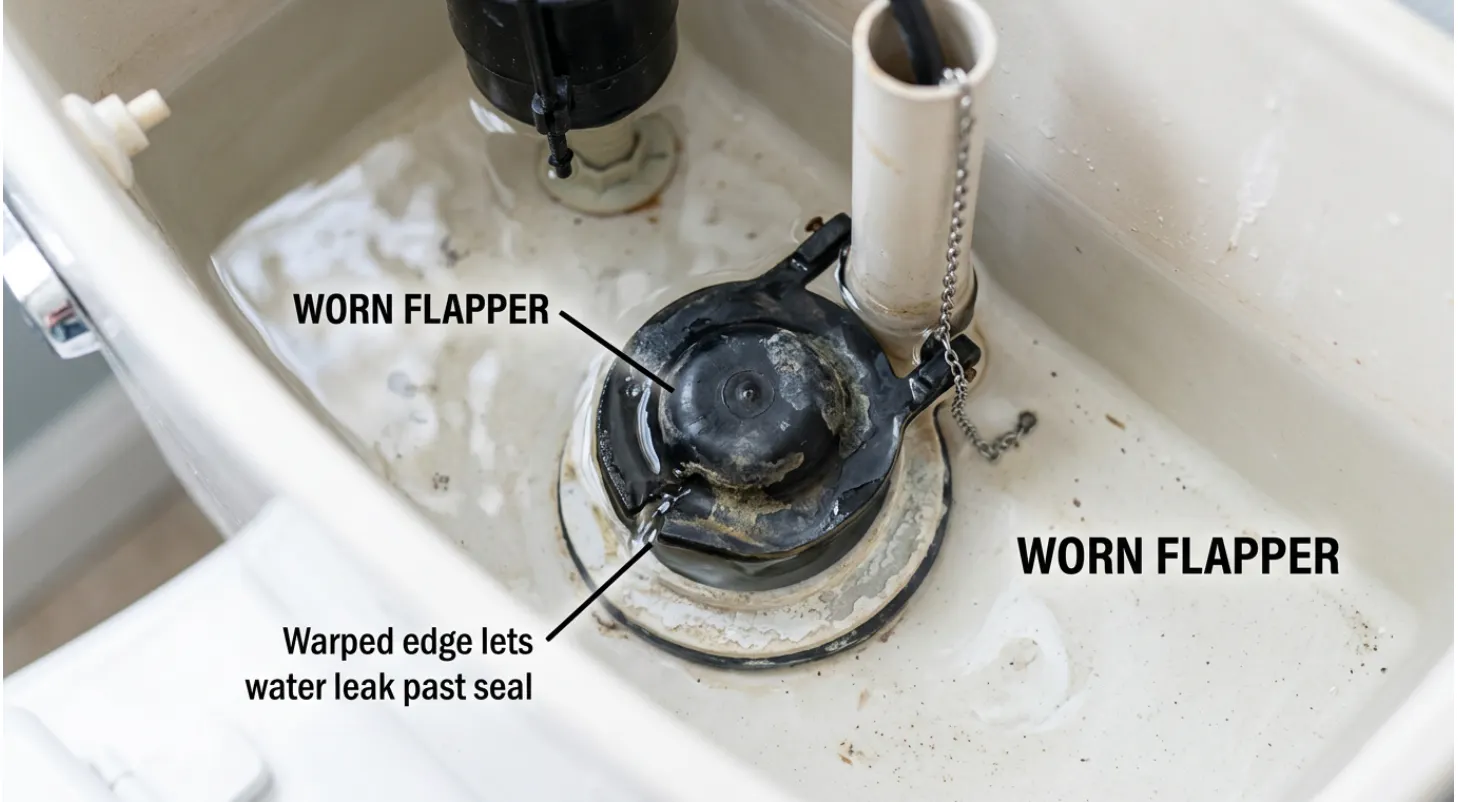
How to Replace a Toilet Flapper (Step by Step)
Toilet flapper replacement takes 15 minutes and costs $5-15. Follow this simple step-by-step guide before you call a plumber.
Aug 13, 2026
Learn more
Breaker Keeps Tripping With Nothing Plugged In: What’s Happening
A breaker that trips with nothing plugged into the circuit isn’t an overload. Learn the real causes, including a full breakdown of arc fault (AFCI) tripping, and when to call an electrician.
Sep 30, 2026
Learn more
How to Unclog a Toilet Without a Plunger
No plunger? No problem. Here are 5 proven ways to unclog a toilet using stuff you already have at home, step by step.
Sep 30, 2026
Learn more