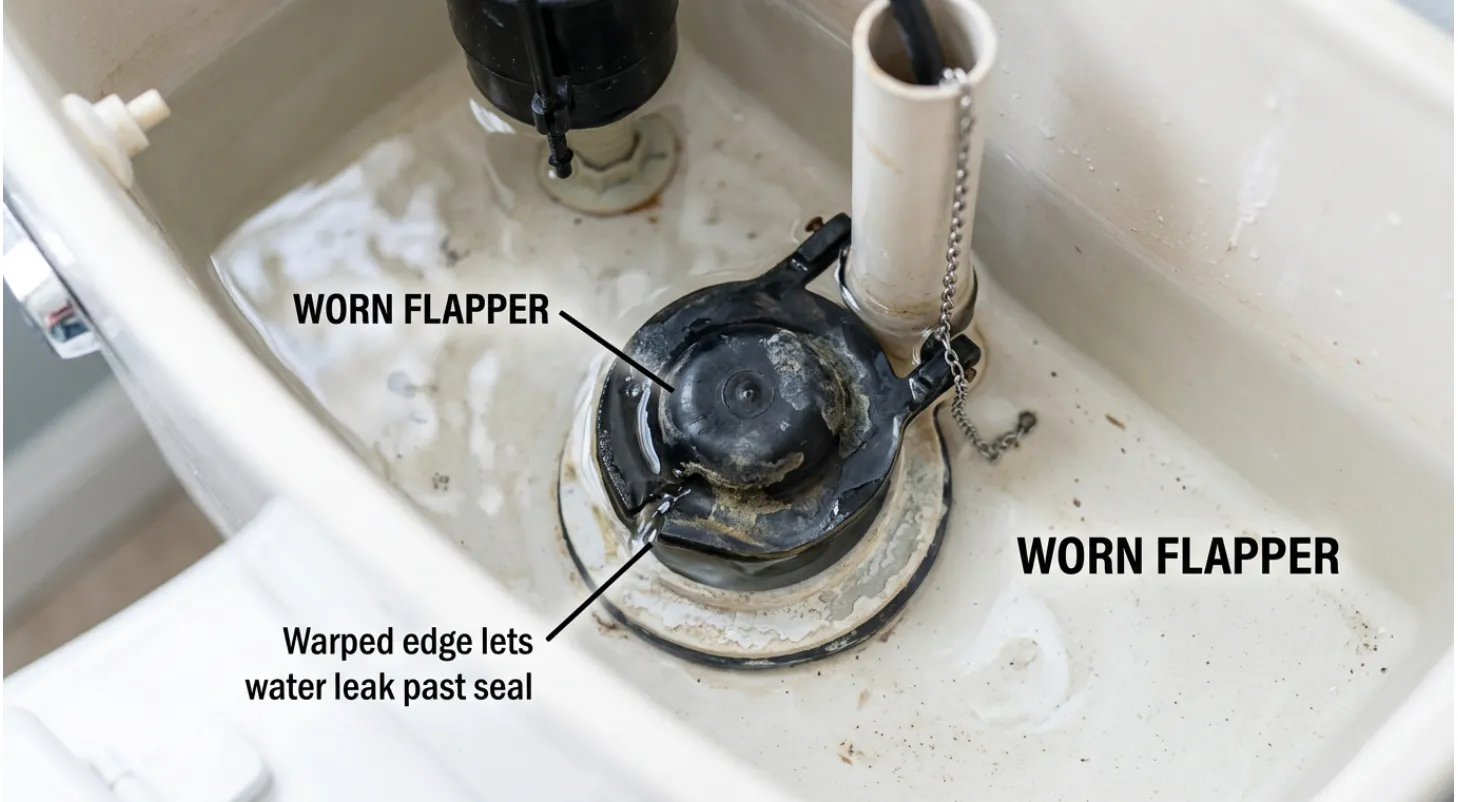
If your toilet keeps running, hisses randomly, or you hear it “phantom flush” itself every hour or two, there’s a good chance the culprit is a worn-out flapper. It’s a $5-15 part, and swapping it out takes most people about 15 minutes with zero plumbing experience required. Here’s exactly how to do it.
The flapper is the rubber or silicone disc that sits at the bottom of your tank, over the flush valve opening. When you push the handle, a chain lifts the flapper, water rushes into the bowl, and the flapper drops back down to seal the tank so it can refill. When that seal goes bad, usually from age, mineral buildup, or chemical toilet cleaners breaking down the rubber, water slowly leaks into the bowl around the clock. Your fill valve senses the drop and keeps topping off the tank, which is the running sound you’re hearing.
Think of the flapper as the drain stopper for your tank, except it has to hold a perfect seal dozens of times a day, for years, while sitting in constant contact with water, minerals, and cleaning chemicals. It’s a small part doing a surprising amount of work, which is exactly why it’s usually the first thing to fail.
If you haven’t confirmed it’s actually the flapper and not the fill valve, our running toilet diagnosis guide walks through a quick 30-second test to tell the two apart before you buy parts.
Before you buy a replacement, it helps to know what a failing flapper typically looks and sounds like, since not every running toilet is a flapper issue:
If instead you’re seeing water actively pouring into the overflow tube no matter how long you wait, that points more toward the fill valve, our fill valve replacement guide covers that scenario.
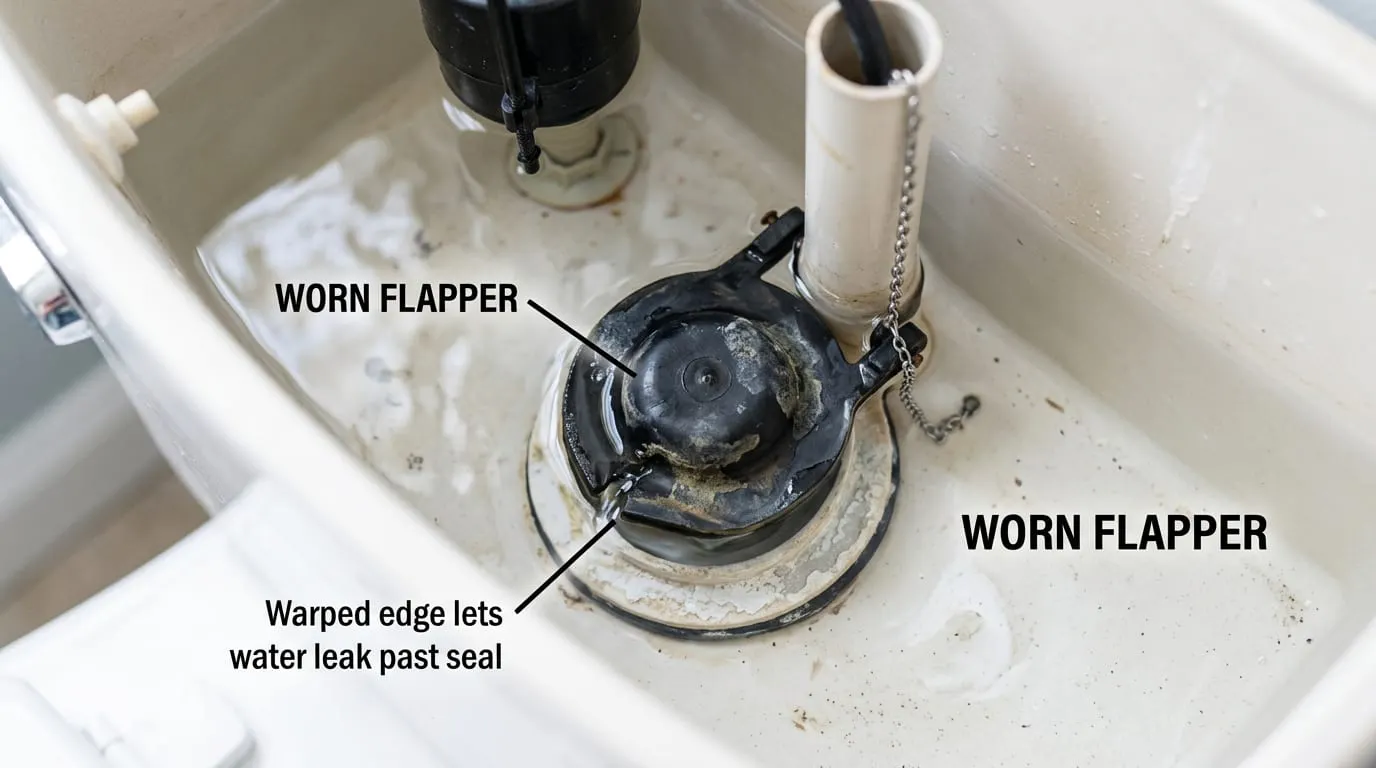
Before you buy: Flappers aren’t perfectly universal. Lift the rubber flap and measure straight across the flush-valve opening at the bottom of the tank. An opening smaller than 2¾ inches uses a standard 2-inch flapper; an opening larger than 2¾ inches uses a 3-inch flapper. No tape measure? A 2-inch opening is roughly the size of an orange or baseball, while a 3-inch opening is closer to a grapefruit or softball. If you are still unsure, take a clear photo of the inside of the tank or bring the old flapper to the store to match it.
A few brand-specific notes worth knowing before you shop:
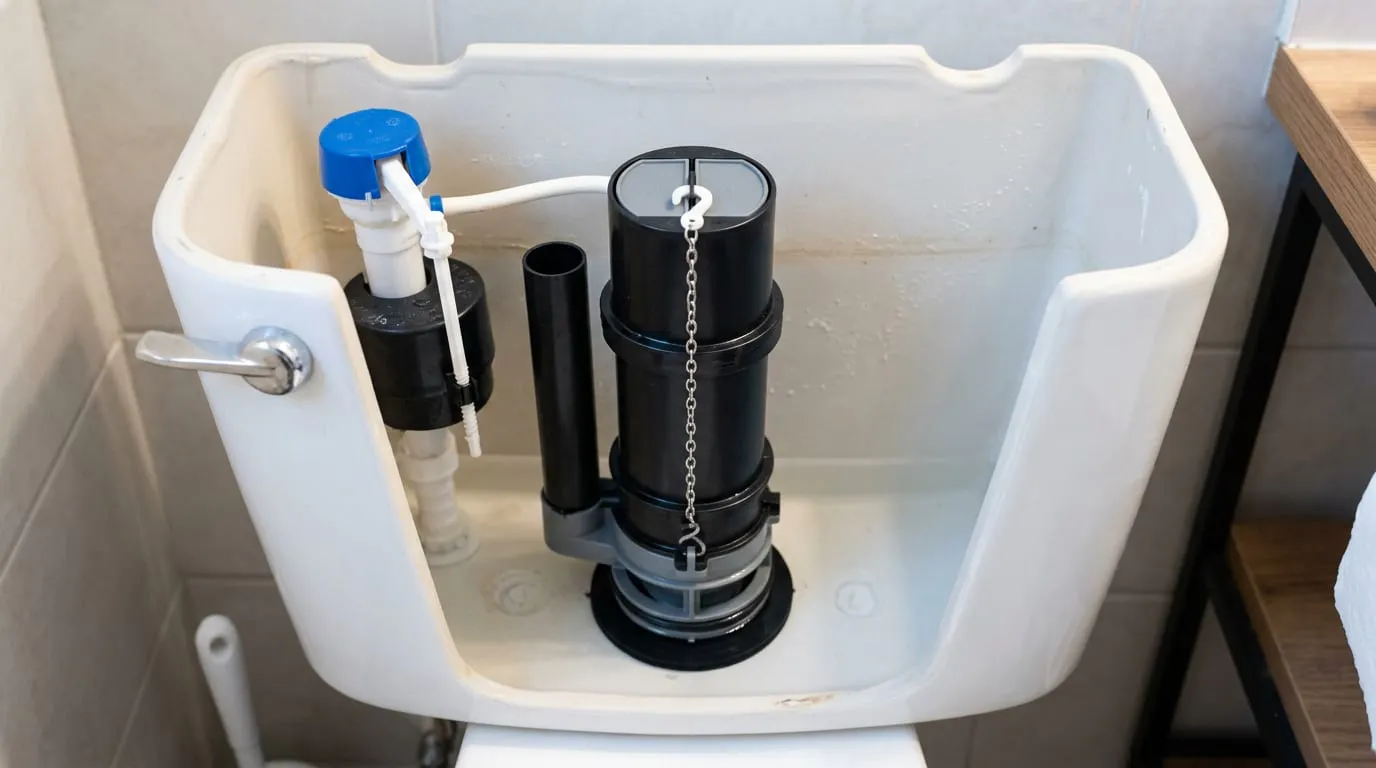
If you look into your tank and see a tall cylindrical unit with a seal at the top rather than a flat rubber disc, you likely have a canister-style flush valve, common on dual-flush toilets. A canister flush valve is part of the flush system, not the fill valve. It uses a seal at the bottom of the cylinder rather than a flat rubber flapper. Replacement seal kits are usually specific to your toilet’s brand and model.To know the difference, here’s a picture of a Canister Flush Valve Toilet for reference:
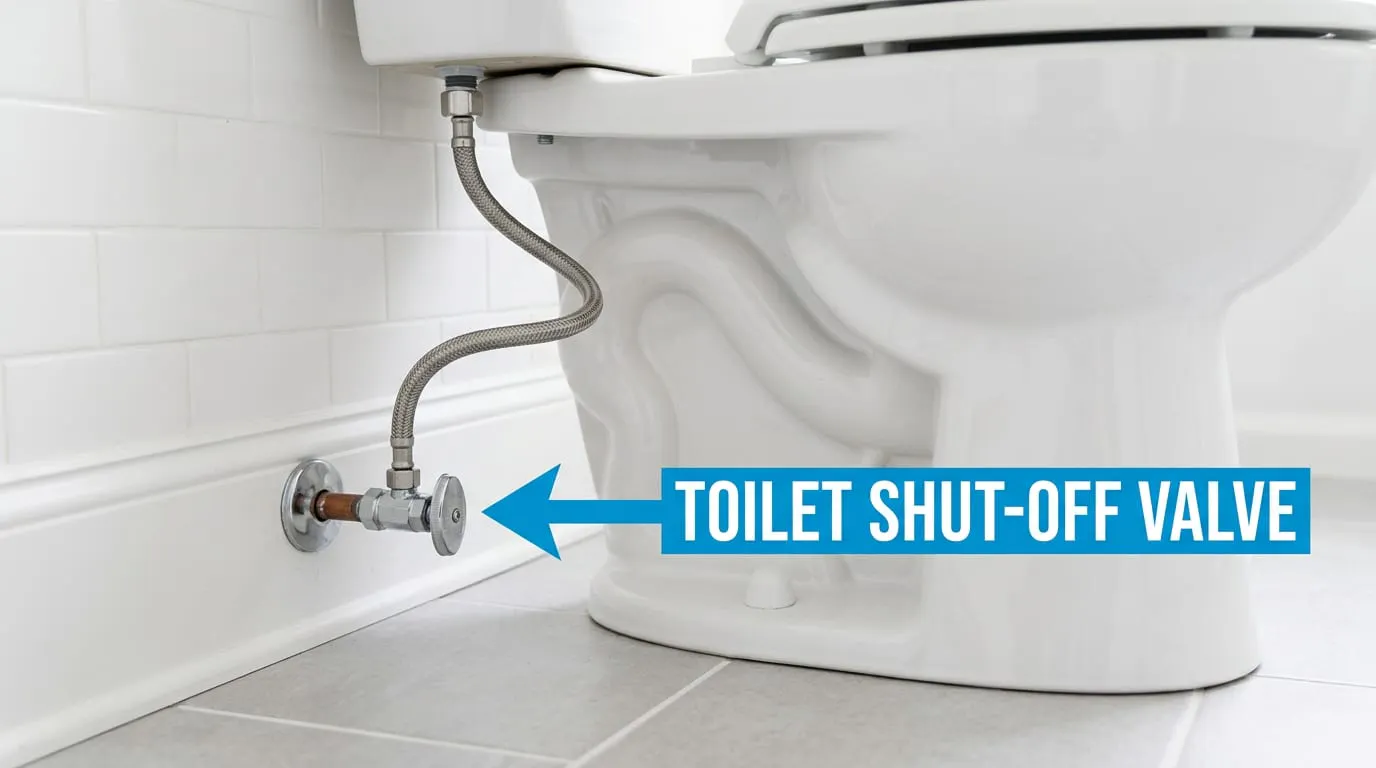
Step 1: Turn off the water supply. Find the shutoff valve, usually a small oval or round knob on the wall behind the toilet, near the floor. Turn it clockwise until it stops. This prevents the tank from refilling while you work. If the valve feels stuck or won’t turn without force, stop. Shut off your home’s main water supply instead, or call a plumber to replace the shutoff valve first.
Step 2: Flush and drain the tank. Flush the toilet and hold the handle down to let as much water out of the tank as possible. Use a towel or sponge to soak up whatever’s left in the bottom. There’s usually a cup or two.
Step 3: Disconnect the old flapper. Unclip the chain from the flush handle arm (it’s usually a simple hook or clip). Then unhook or slide the flapper’s mounting ears off the two pegs on either side of the overflow tube. Note which hole on the handle arm the chain used.
Step 4: Clean the flush valve seat. While the flapper is out, wipe around the opening at the bottom of the tank with a cloth. Mineral deposits and grime here can keep a brand-new flapper from sealing properly, so this step matters more than people think. If you see a stubborn chalky ring, a bit of white vinegar on the cloth will help dissolve it. Just rinse the area afterward so no residue interferes with the new seal.
Step 5: Install the new flapper. Attach the mounting ears (or slide the ring down the overflow tube) so the flapper sits centered directly over the flush valve opening. It should lie flat and seal completely when not lifted. If the new flapper has an adjustable frame (common on universal models), make sure both sides are set to the same width so it doesn’t sit crooked.
Step 6: Reattach the chain. Clip the chain to the flush handle arm with a little slack, about a half-inch of give when the flapper is fully seated. Too tight and the flapper won’t seal; too loose and it won’t lift enough on flush. This is the step people most often get wrong, so double-check it.
Step 7: Turn the water back on and test. Turn the shutoff valve counterclockwise, let the tank fill, and flush once to test. Watch the flapper drop and seal. Do the food-coloring test if you want extra confidence: add a few drops to the tank, wait 15 minutes, and check the bowl for color.
New flappers typically last 3-5 years, but even a fresh flapper can fail to fix the problem if one of these slips through:
Occasionally a new flapper doesn’t fully solve it, usually because the real issue was the fill valve all along, or because the chain length still needs adjusting. If you’re still hearing water running after trying this fix, check out our guide on why your toilet keeps running, which covers all seven possible causes so you’re not stuck guessing.
If you’ve swapped the flapper and you’re still not sure what’s going on, snap a photo of your open tank in the HomeFlash app. It’ll diagnose what it sees in about 60 seconds, free, and let you know if the issue points to something else, like the fill valve, the float, or a chain problem you might have missed. For the bigger picture on diagnosing a running toilet from scratch, see our complete guide to fixing a running toilet.
HomeFlash was created to help modern homeowners identify the problem and fix it if the repair is simple, just like replacing a flapper or fill valve. The goal is to help homeowners feel comfortable, confident, and safe while saving time, money, and stress, not to push people into repairs they aren’t comfortable with.
That mission came from real experience. When I bought a home, there were plenty of situations where having a product like HomeFlash would have made ownership feel less overwhelming. Even when a contractor still needed to be called, it would have helped to at least understand what the problem might be before making that call. Even when you need a pro, it helps to understand the likely issue and ask informed questions before the appointment.. We literally engineered HomeFlash with past experiences in mind, constantly reverting to the same question: how can we support modern homeowners in a time of anxiety and uncertainty? Maybe more importantly, we consider everyone’s natural instinct to save money and time whilst making informed decisions safely. Homeowners no longer have to be intimidated by simple fixes like replacing flapper anymore (which can be costly the longer it waits due to running water) with HomeFlash. The most common problem with a toilet, replacing a flapper, can now be handled with confidence with HomeFlash.
More plain-English repair guides from the HomeFlash library.

Toilet Fill Valve Replacement: When and How
Learn when a running toilet means the fill valve, not the flapper, plus a full step-by-step replacement guide anyone can do in 30 minutes.
Sep 30, 2026
Learn more
Why Does My Toilet Keep Running? (7 Causes)
Toilet keeps running and you don’t know why? Here are the 7 most common causes, how to tell them apart, and how to fix each one.
Sep 30, 2026
Learn more
Breaker Keeps Tripping With Nothing Plugged In: What’s Happening
A breaker that trips with nothing plugged into the circuit isn’t an overload. Learn the real causes, including a full breakdown of arc fault (AFCI) tripping, and when to call an electrician.
Sep 30, 2026
Learn more
How to Unclog a Toilet Without a Plunger
No plunger? No problem. Here are 5 proven ways to unclog a toilet using stuff you already have at home, step by step.
Sep 30, 2026
Learn more